Have you ever wondered how to improve your golf game without leaving your home? Setting up a golf launch monitor at home can be a game-changer for your practice sessions.
It gives you instant feedback on your swing, ball speed, and trajectory, just like the pros use. But how do you get started? You’ll discover simple, step-by-step instructions to set up your own launch monitor quickly and easily. Ready to take your golf skills to the next level from the comfort of your living room?
Keep reading, because we’ve got you covered.
Choosing The Right Launch Monitor
Choosing the right launch monitor is important for a good home golf setup. It helps track your shots and improve your skills. The right device fits your needs and space. It also matches your budget and the level of accuracy you want. Understanding the options will make your choice easier.
Types Of Launch Monitors
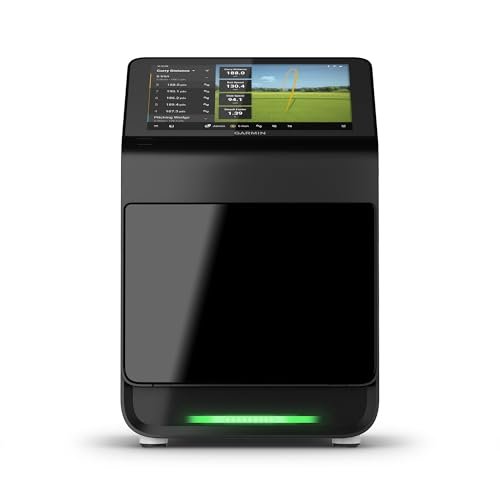
There are mainly three types of launch monitors. Radar-based monitors use radio waves to track the ball and club. Camera-based monitors use high-speed cameras to capture swing data. Infrared monitors use sensors to measure ball speed and spin. Each type offers different features and works best in certain spaces.
Key Features To Consider
Look for features like ball speed, launch angle, and spin rate. Some monitors also track club speed and swing path. Easy setup and portability help if you want to use it inside or outside. A clear display or app support makes it simple to read your data. Battery life and update options add value too.
Budget And Accuracy
Budget affects the accuracy and features you get. Basic models are cheaper but may miss some data points. Higher-priced monitors offer better accuracy and more details. Think about how serious you are about golf. Choose a monitor that fits your budget and gives reliable results.
Selecting The Ideal Location
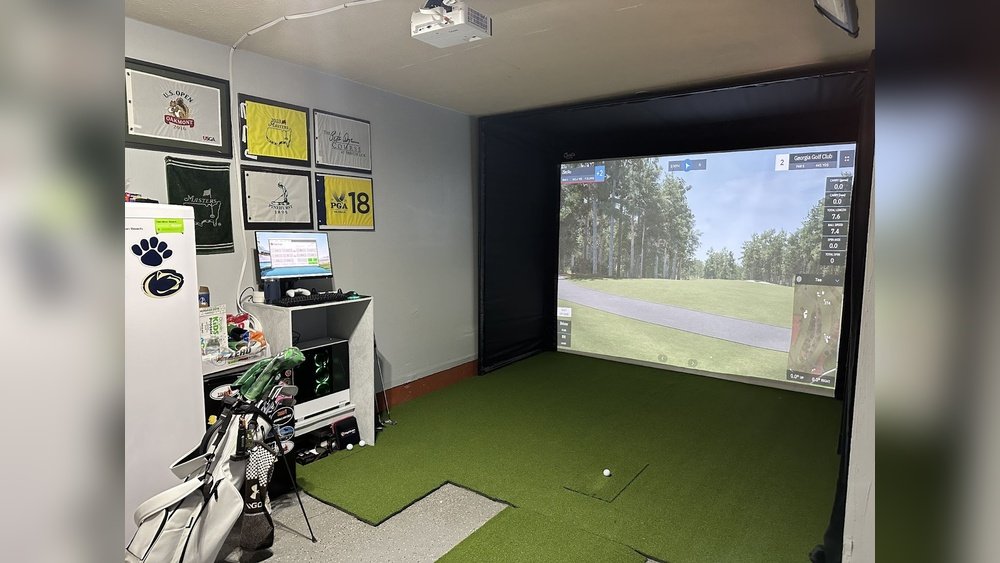
Setting up a golf launch monitor at home starts with picking the right spot. The location affects how well the device works and your practice quality. Choose a place that fits your needs and the monitor’s demands. Consider space, light, and the surface carefully. These factors help you get the best results and enjoy your practice time.
Space Requirements
Give yourself enough room to swing comfortably. The area should be wide and long enough for full swings. Check the monitor’s manual for exact space needs. Leave space behind the hitting area for safety. Avoid cramped corners or cluttered rooms. Clear space prevents accidents and helps sensors work well.
Lighting Conditions
Good lighting makes the monitor work better. Bright, even light reduces shadows and glare. Avoid direct sunlight on the monitor or hitting area. Soft indoor lights or shaded spots work best. Poor lighting can cause tracking errors and poor data. Adjust curtains or lamps to create steady light.
Surface And Background
Pick a flat, firm surface for hitting golf balls. Carpet or hard floors are usually fine. Avoid slippery or uneven floors that can cause slips. The background behind the hitting area should be plain and uncluttered. Dark or solid colors improve sensor accuracy. Keep pets and objects away from this area.
Setting Up The Equipment
Setting up your golf launch monitor at home is simple with the right steps. This guide focuses on preparing your equipment for accurate readings. Proper setup helps you get the best results from your practice sessions.
Mounting And Positioning
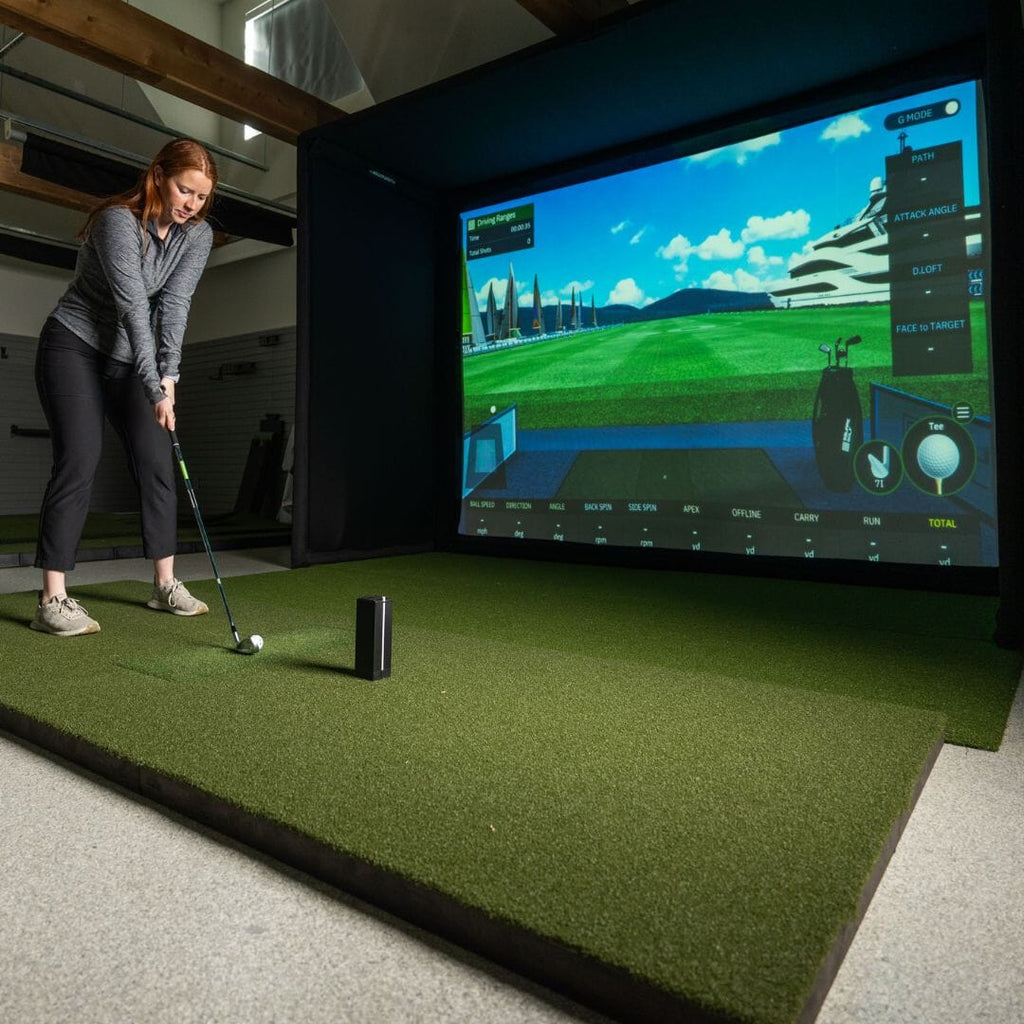
Place the launch monitor on a stable surface near your hitting area. It should face the ball directly for clear data capture. The device must be at the right height, usually level with the ball. Keep a safe distance to avoid interference with your swing.
Power And Connectivity
Connect the launch monitor to a power source before use. Some models use batteries, others need an outlet. Turn on the device and check the battery level if applicable. Link the monitor to your phone or computer via Bluetooth or Wi-Fi to view data.
Calibrating The Device
Calibration ensures the monitor gives accurate measurements. Follow the manufacturer’s instructions for calibration steps. Use a practice ball to test the readings. Adjust settings if the data seems off. Repeat the process until results are consistent and reliable.
Preparing Your Golf Setup
Preparing your golf setup at home is important for accurate launch monitor readings. A good setup ensures your practice feels real and helps you improve faster. It starts with picking the right equipment and arranging your space carefully. Small details make a big difference in your results.
Choosing The Right Golf Balls
Select golf balls that match your skill level and the monitor’s requirements. Use balls that are clean and in good condition. Some launch monitors work better with specific ball types. Avoid old or damaged balls to get precise data. Practice with the same balls you plan to use on the course.
Positioning The Tee Or Mat
Place your tee or hitting mat on a flat, stable surface. Make sure it aligns well with the launch monitor’s sensors. The ball should sit at a comfortable height for your swing. Keep enough space around you to swing freely. Check that the mat does not move during your practice.
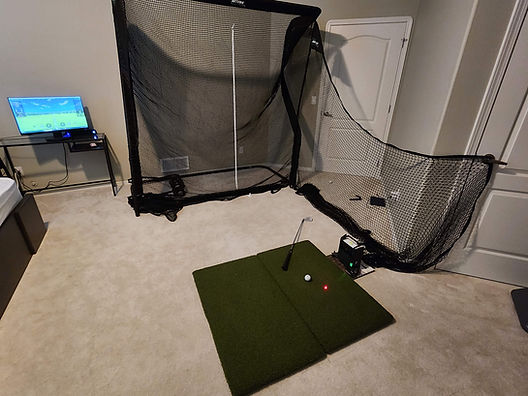
Safety Precautions
Create a safe area around your setup to avoid accidents. Clear any objects that might get hit by a stray ball. Use a net or screen behind the ball to catch shots. Keep pets and people away from your swing zone. Wear proper shoes for good footing and balance.
Using Software And Apps
Using software and apps is key to getting the most from your golf launch monitor. These tools help you see detailed data about your swing and ball flight. They make the numbers easy to read and understand. You can track progress and adjust your practice based on real information. Setting up the software is simple and quick. It connects your launch monitor to your phone, tablet, or computer.
Installing Necessary Apps
Start by downloading the app designed for your launch monitor. Most brands have their own free app available in app stores. Check your device’s compatibility before installing. Follow the instructions on the app to complete installation. Some apps may require account creation for full features. Keep the app updated to access new tools and fixes.
Connecting To Devices
Turn on your launch monitor and enable Bluetooth or Wi-Fi. Open the app on your device and select the option to connect. Look for your launch monitor’s name in the list of available devices. Tap to pair and confirm any prompts. Connection usually takes a few seconds. If the connection fails, restart both devices and try again.
Interpreting Data And Metrics
The app shows data like ball speed, launch angle, and spin rate. Each metric tells you about your shot’s quality. Use graphs and charts for easy understanding. Focus on numbers that match your goals. Some apps offer tips based on your data. Save sessions to track your improvement over time.
Troubleshooting Common Issues
Setting up a golf launch monitor at home can sometimes lead to common problems. These issues can stop your device from working properly. Knowing how to fix them saves time and frustration. Below are simple tips to solve common troubles quickly.
Signal And Connectivity Problems
Launch monitors often use Bluetooth or Wi-Fi to connect. Weak signals cause data delays or no connection. Keep the monitor close to your phone or tablet. Turn off other devices that use the same network. Restart your monitor and app to refresh connections. Make sure your device’s software is up to date.
Accuracy And Calibration Errors
Errors in data can happen if the monitor is not calibrated. Follow the manufacturer’s steps to calibrate before each use. Use a flat surface and clear the area around the monitor. Check the monitor’s position and angle carefully. Recalibrate if the results seem off or inconsistent. Regular calibration keeps data reliable and precise.
Environmental Interferences
Lighting and surroundings affect launch monitor performance. Bright sunlight or strong shadows can cause wrong readings. Avoid direct sunlight on the sensor. Use the monitor in a shaded or indoor area for best results. Remove any objects or reflective surfaces near the device. Keep the hitting area free of clutter to reduce interference.
Maximizing Practice Sessions
Maximizing practice sessions with a golf launch monitor at home helps improve your skills faster. It allows you to see clear data about your swings and shots. Using this data wisely makes practice more focused and effective.
Tracking Progress
Keep a record of your practice results over time. Watch how your swing speed, ball speed, and distance change. This helps you notice small improvements or areas needing work. Regular tracking makes progress clear and motivates consistent practice.
Setting Goals
Set simple, clear goals for each session. Aim to improve one aspect, like accuracy or swing speed. Goals give direction to your practice and keep you focused. Adjust goals as you improve to stay challenged and engaged.
Incorporating Feedback
Use the launch monitor’s data to understand your mistakes. Pay attention to shot patterns and error types. Change your practice based on this feedback to fix weak spots. Feedback helps make every swing count and improves your overall game.

Frequently Asked Questions
What Equipment Do I Need To Set Up A Golf Launch Monitor?
You need a launch monitor device, a hitting mat, and a net or screen. A tripod or stand helps position the monitor correctly. Ensure you have enough space for full swings and accurate data capture.
How Do I Position A Launch Monitor At Home?
Place the launch monitor behind or beside your hitting area, following the manufacturer’s instructions. Keep it stable and at the correct height for accurate ball and club data. Avoid obstructions or reflective surfaces nearby.
Can I Use A Golf Launch Monitor Indoors Effectively?
Yes, indoor use is possible with enough space and proper lighting. Use a hitting net and mat to protect surroundings. Ensure your monitor supports indoor settings for accurate readings.
How Do I Calibrate My Golf Launch Monitor?
Follow the device’s calibration steps in the manual, usually involving alignment and sensor checks. Regular calibration ensures precise shot data. Some monitors auto-calibrate or use a mobile app for setup.
Conclusion
Setting up a golf launch monitor at home is simple and rewarding. Start with a clear space and follow the device instructions closely. Check the calibration to ensure accurate data. Practice regularly to see real improvements in your swing. A home launch monitor helps track progress without leaving your house.
Enjoy learning more about your golf game every day. This small investment can boost your confidence and skills. Keep your setup organized and ready for practice anytime. Golf at home just got easier and more fun.